With the pop-up forms tool, you can create engaging lead capture forms to attract new leads. You can use pop-up forms with any blog post, landing page, or website page hosted on HubSpot.
When creating a pop up form, you can follow these simple steps from the HubSpot knowledge base here.
To further enhance the experience, here are some tips:
- The pop-up form should be a quick eye-catching grab of attention and the visitor should be able to easily fill out the form.
- Try using a shorter headline and dot points/bold items in the text to help the main messages stand out.
- If anyone fills in this pop-up form, they should also be 'enrolled' in the following:
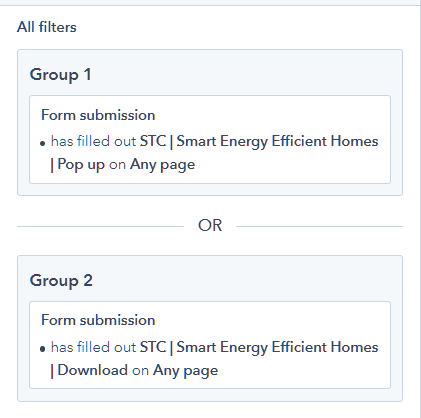
- HubSpot Active List: Pop Up Form Submission: This will show you who submitted the form. This is how the list filter should be set up (this one looks at a regular form + a pop up form):

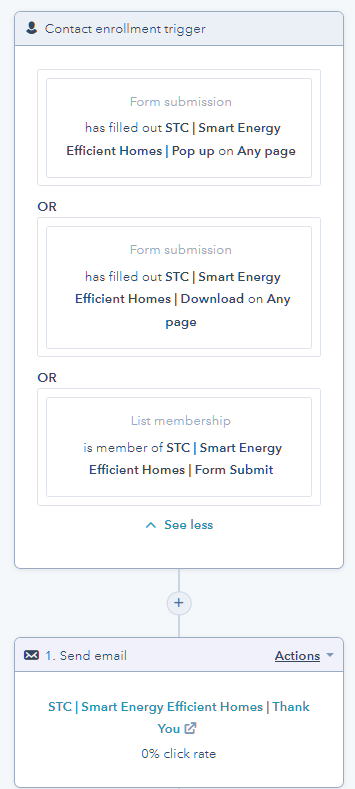
- Thank You Workflow - this will provide a great user experience of the contact receiving a Thank You email after filling in the form.
Here is how the workflow trigger is set up:
- HubSpot Active List: Pop Up Form Submission: This will show you who submitted the form. This is how the list filter should be set up (this one looks at a regular form + a pop up form):
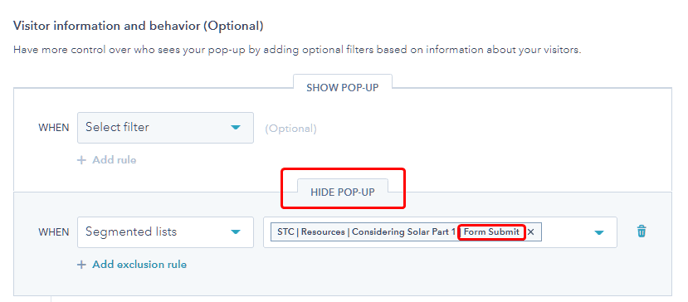
- Don't forget to add an exclusion to your pop-up form targeting. Exclude anyone who already filled in the form. This simply means the pop up will no longer show for people who have already filled in the form. You can add it here:

Pop-up forms targeting general rules:
- Show Popup rules should always include the explicit domain as part of the conditions
- Show Popup rules should usually use "begins with" conditions (ie so that any URL parameters don’t cause issues)

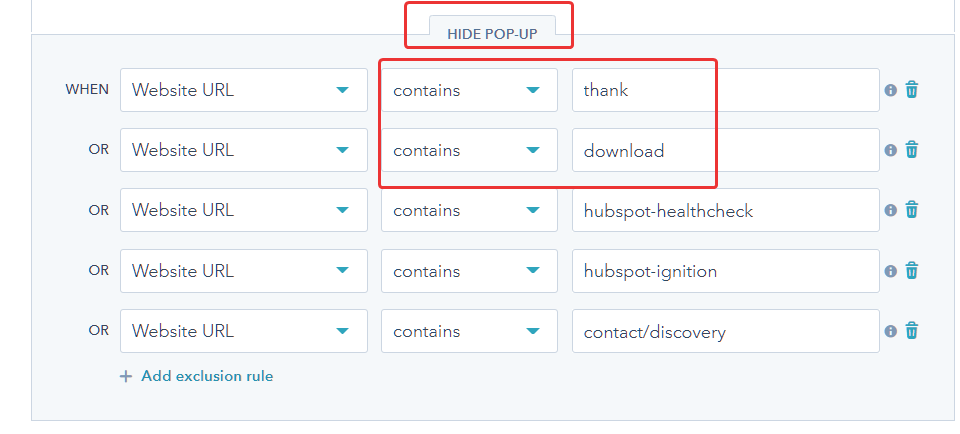
- And then Hide Popup should catch all the pages we don’t want eg anything with ‘thank’ or ‘download’ in the URL

We have a whole HubShots episode dedicated to forms best practices. Learn more about pop-up forms and forms in general here. You may also watch this episode in YouTube here.
